MONSOON MAILER: SENDING YOUR FIRST EMAIL A-TO-Z STEP BY STEP WITH SCREENSHOTS
Overview
We Understand This Can Be Overwhelming...
Sending your first email on a new Email Service Provider can be daunting. We have put together a tutorial to walk you through it on our platform step by step. If you have a FREE TRIAL account or your account has already been configured by an Administrator at your company, you should find this useful.
If you contrast our system with that of other ESPs you will find that our system is overwhelmingly simple to use and yet maintains the functionality of our competitors and much, much more. This system was built for people who need to get messages out, not people who want to tinker endlessly with complex settings and screens. And of course, our support team is always available at https://support.monsoonmailer.com or email://support@monsoonmailer.com.
Assumptions
- In order to make this work you can view this knowledgebase tutorial on your mobile device, but we expect that you will be, this first time at least doing this process on a computer where you can see more on your screen.
- We do not expect you to have any broadcast lists, etc., you do not need them for this tutorial
- You have an email address of your own either at your company or at an email provider such as GMAIL, YAHOO, etc.
- If you are using GMAIL, YAHOO, AOL, etc... they may tag your email as "junk" unless you know how to craft it and you may need to check the junk folder. This has nothing to do with our system and our experts can help you resolve any such issues.
- You do not need to make any DNS changes to SPF, Domainkey, DKIM, or PTR records to go through this tutorial.
- You must understand how to use a modern desktop computing system, it's graphical user interface and the operation of a Human Interface Device, such as a Mouse.
- THIS ONLY SENDS A "TEST" MAILING and not an actual broadcast.
FREE ACCOUNT LIMITS
- You can do almost EVERYTHING in the system, except you may only send email to the email account you validated when you signed up.
- The FREE Trial Starts only after you click on a certain link and we will hilight that in the tutorial
- You have signed up for our FREE account, or have account set up by you or someone else.
Walking Through Sending Your First Newsletter
Logging in
- The first thing you need to do is go to our login page at http://esp.monsoonmailer.com and log in:
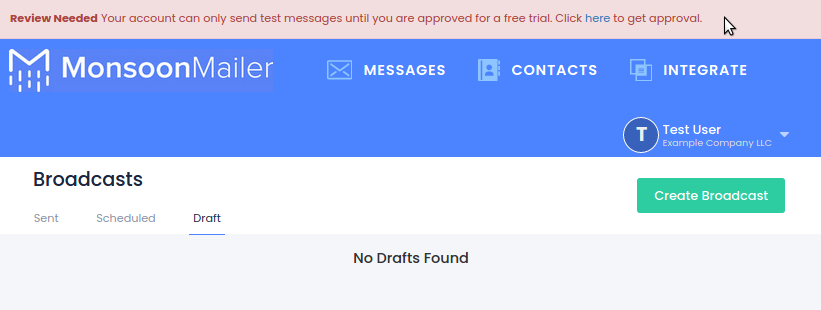
- Once you log in you will see a notice at the top if you have a FREE ACCOUNT. In order to start the clock on your FREE TRIAL Click on the "here" in the message to request a functioning FREE trial :
Understanding the Interface
Monsoon Mailer has a very easy to use interface. Along the top edge you have 3 major sections:
- MESSAGES -- where you will compose, edit and manage the broadcast messages you want to send
- CONTACTS -- where you will load, segment and manage the email contact lists you are using for your messages
- INTEGRATE -- where you will perform API and SMTP integrations, leverage the AWESOME Power of Zapier and Pabbly where it is possible to create AI Chatbots, AI Workflows, reduce lead costs and so much more!!!
Let's Create our First Broadcast, Shall We...
(We are using necessary values for the FREE Account, if you have a paid account you would use your values.)
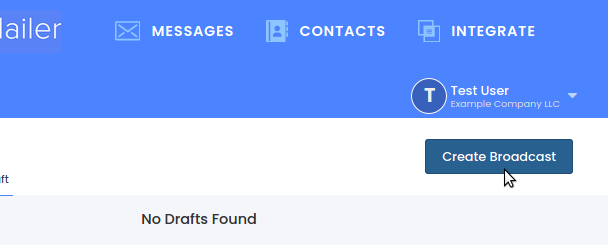
- Click on [CREATE BROADCAST]
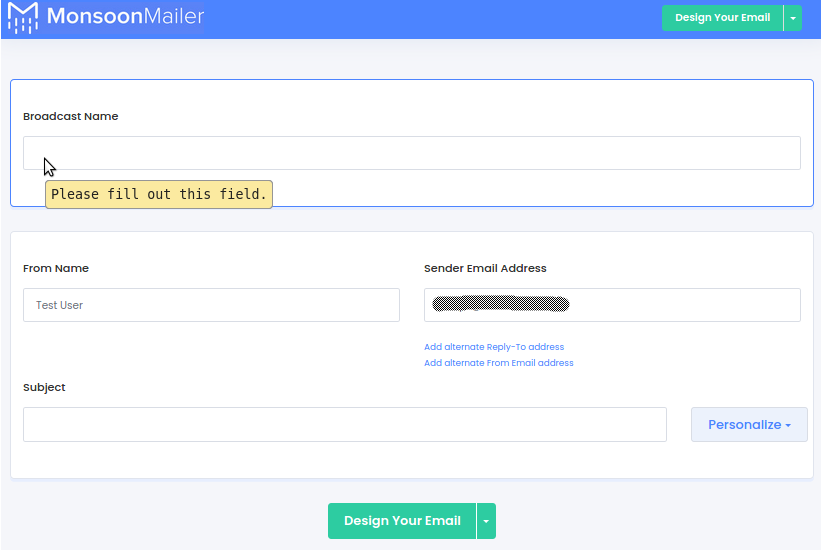
- This will bring up a window where we define the basic aspects of this mailing, such as it's name, who's sending it, and the message subject. For now we'll keep it simple:
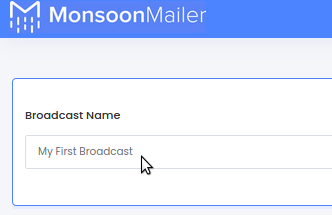
- So please fill in the "BROADCAST NAME" with "My First Broadcast"
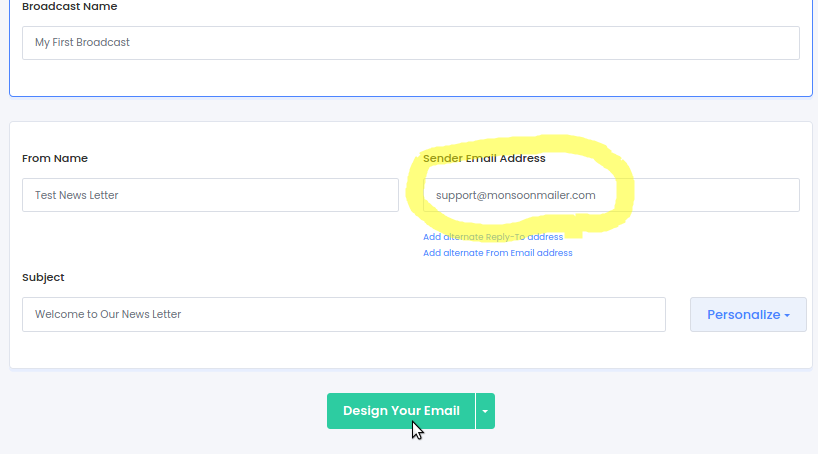
- So please fill in the "FROM NAME" with "Test User"
- Fill in the "SENDER EMAIL ADDRESS" with "noletter@mmailer.net" <-- THIS IS VERY IMPORTANT, if you don't do this, you won't get your test because the recipient system will think you are forging email when you are using the FREE account), otherwise you would put in your originating email as we did here:
- Then you would put "Welcome to Our News Letter" in the "SUBJECT" Field.
- Once that's doen, click the [DESIGN YOUR EMAIL] button. Be careful not to click the downward arrow on the right-hand side of that button as that would launch the legacy editor which this tutorial DOES NOT cover.
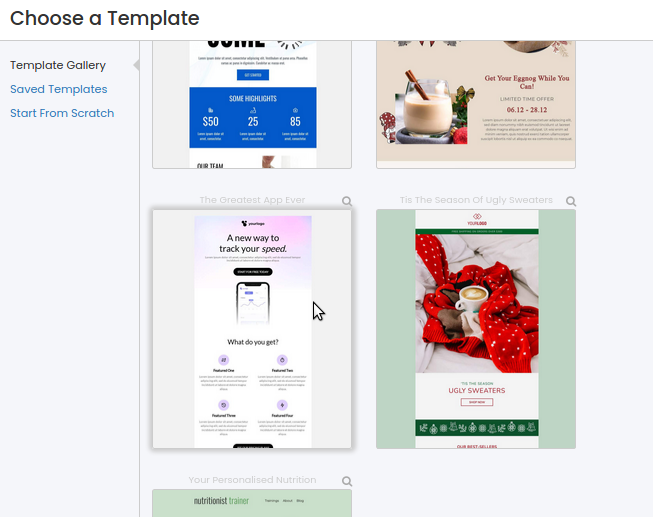
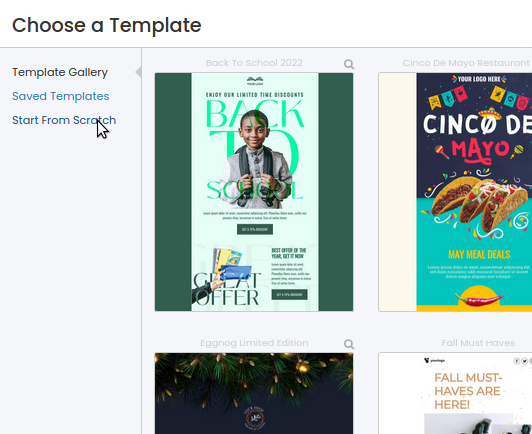
- Once clicked, it will bring up a dialog where you are able to chose from templates we have loaded into the system, templates you have built and saved, or start from scratch which will provide you with a blank canvas.
- At this time we are going to "START FROM SCRATCH" so you can see how easy it is to built a nice mailing:
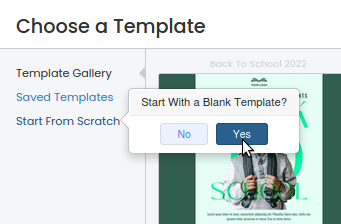
- When prompted "Start With a Blank Template?" please click [YES]:
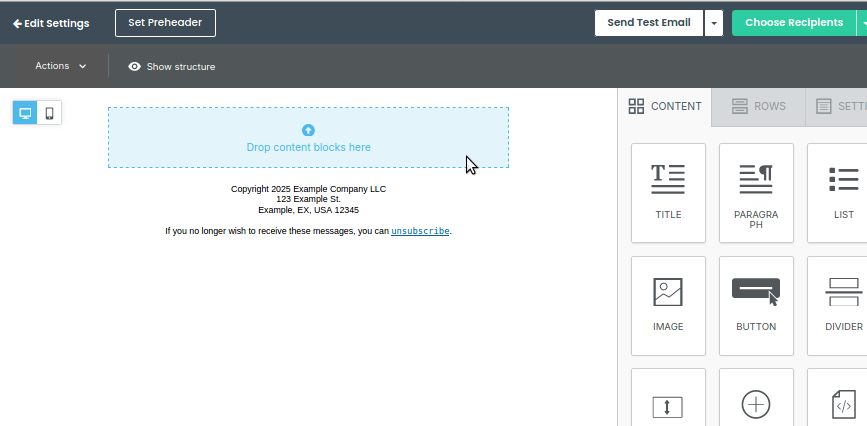
- This will open the template builder/editor, ready for you to start creating:
Laying Out a Simple Message with the Template Builder/Editor...
Most people don't know how actually hard it is to create a colorful email message that will look nice on the deskop. mobile, tablet and other display devices. They all have different standards and with all the different email clients and browsers, they all do things a little differently. This template builder/editor is a standard in the industry and makes this process dramatically easier. It allows you to treat each piece of your message like and object and do drag/drop functionality with each object. And as you define the attributes of each object the message will come into shape:
The Editor/Builder has 3 major sections left-to-right
- The toggle between desktop and mobile so you can see how it might render
- The template construction area where the template is laid out like a bunch of verticle blocks stacked on top of each other and then their indivdual attributes are programmed
- The selection panel on the right side which allows you to pick a "Title" object, a "Paragraph" object, an "Image" object or so many other things so you can literally just drag them into place and then edit their individual characteristics.
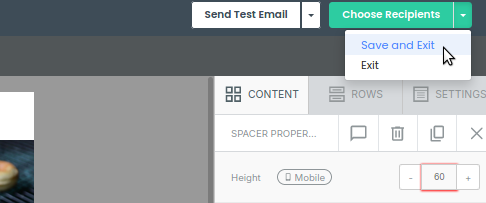
- Note that at any time during this process if you need to stop and exit you may do so by clicking on the little downward arrow at the right of the [CHOOSE RECIPIENTS v] button at the top-right:
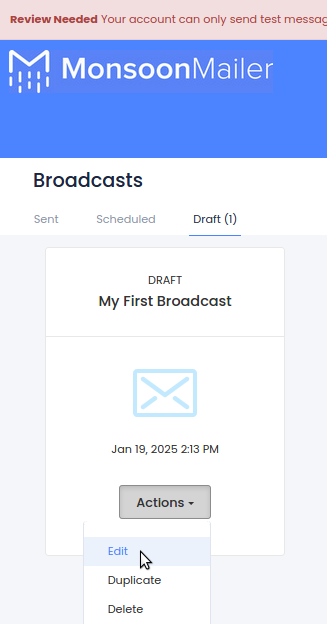
- You can revisit it later here:
-
find your mailing, click on the [ACTIONS v] button and select "EDIT" to open the template editor/builder and again access this mailing template or any other.
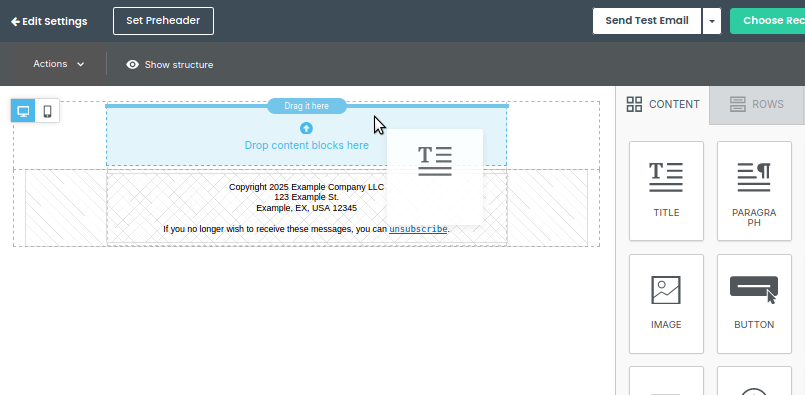
- So the first thing we will do is click on the TITLE block on the right-hand side and drag it into the "Drop Content Blocks Here" object and then "let go":
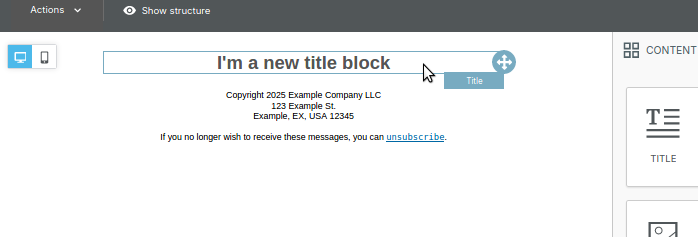
- Once you let go you can click and edit the text like any other text and it will look like this:
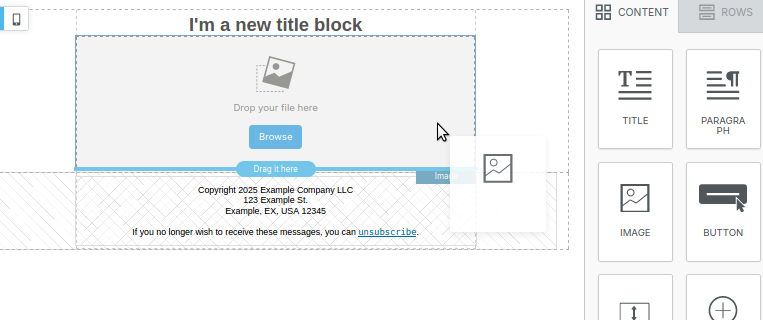
- Then we will grab an "image" block and drag it onto the template and drop it underneath the "title block" like so:
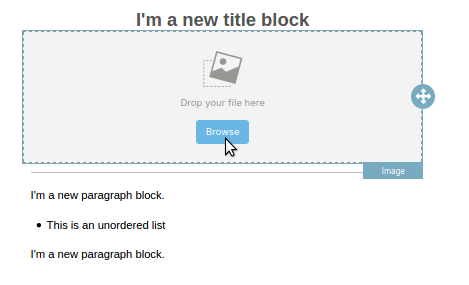
- Before we pick a graphic for that block we added a few more "blocks" from the right, dragging them onto the template editor/builder work area; including:
- a separator
- a paragraph block
- a bulleted list holder
- another paragraph block
- Now we will go back and start filling in the image block and others.
- We need a graphic to fill in the "Image Block" so click on [BROWSE]:
- Once you click, you will be presented with some choices about where you are going to get the graphic from, as follows:

- UPLOAD -- If you click this it will let you upload the graphic from the device you are using
- IMPORT -- if you click this it will allow you to provide a URL to a graphic from somewhere else on the web and import them; and
- SEARCH FREE PHOTOS -- will give you access to our HUGE photo library.
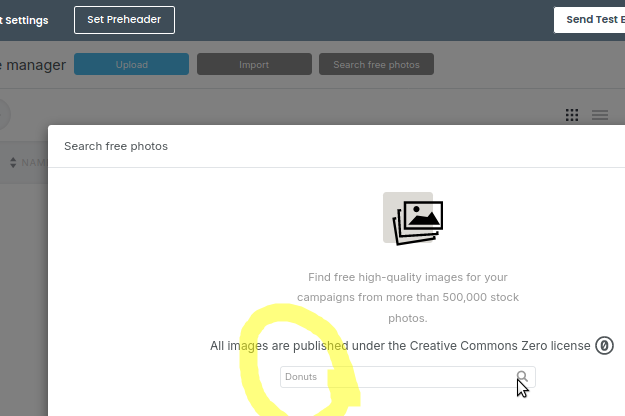
- We are going with door #3 "SEARCH FREE PHOTOS"
- You'll be presented with a new dialog and in the search field (circled in yellow) type the word "Donuts" and click the search "spyglass" to search:
- In a few seconds it will pop up with a bunch of possible graphics with "Donuts" in them:
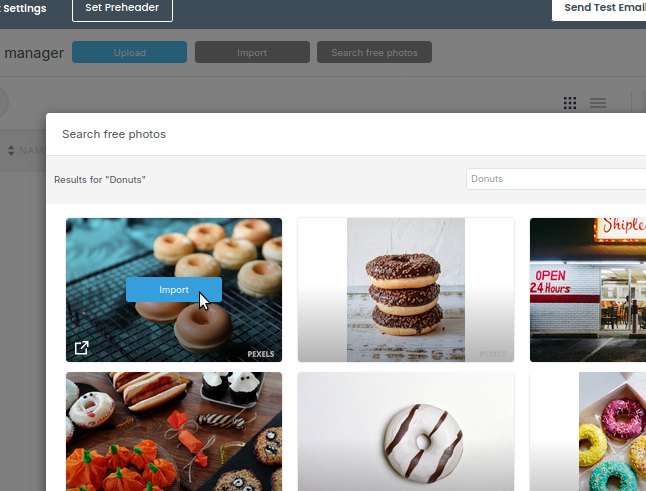
- .We we will click on the top-left one and then click on the [IMPORT] button that appears and import the image:
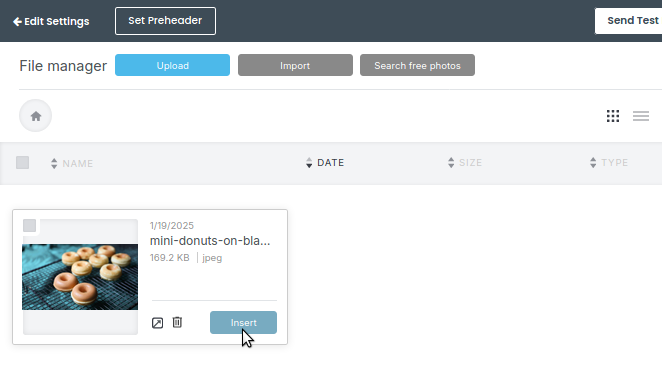
- Then click [INSERT] to insert it into our tempalte.
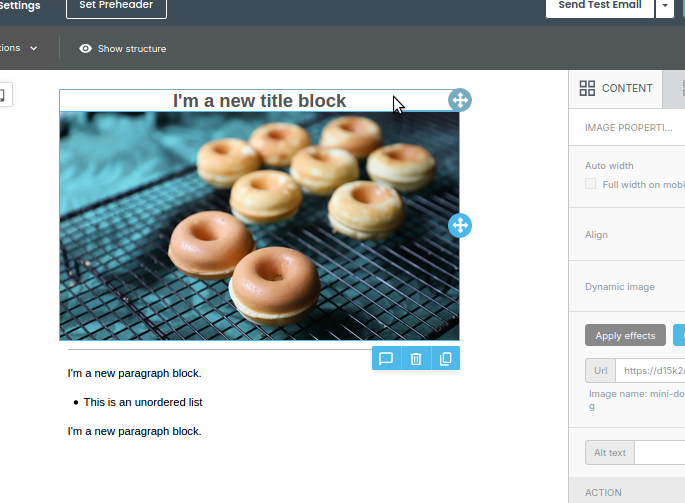
- .Once it's imported and inserted it looks like this in the template editor/builder:
- Subsequently we expanded the other paragraph blocks and bulleted list box, added another title block and filled that in as well, and then we added an email RSVP Link at the bottom:
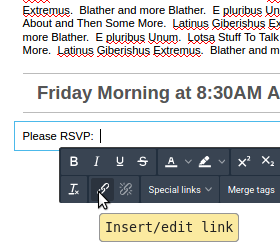
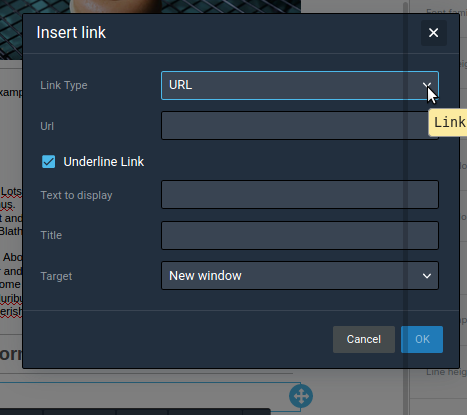
- After typing in "Please RSVP:" into the paragraph block, we needed to insert a link that the reader could click on to trigger an email to the sender with their RSVP. This could also be a link to a webpage where this information could be entered as well. Once the chain-link was clicked it looked like this:
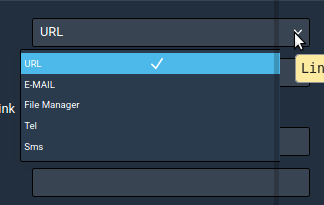
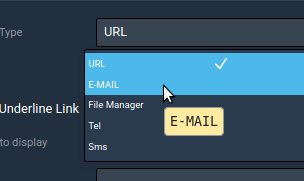
- We switched it to EMAIL instead of URL by clicking on the "Link Type" and changing it:
- And we ultimately selected "EMAIL":
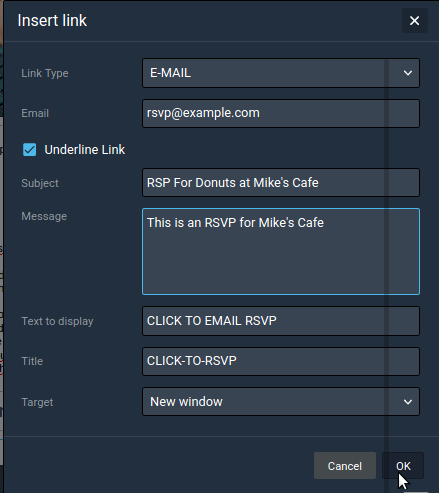
- And then we filled in all the details so it would compose most of the email as well:
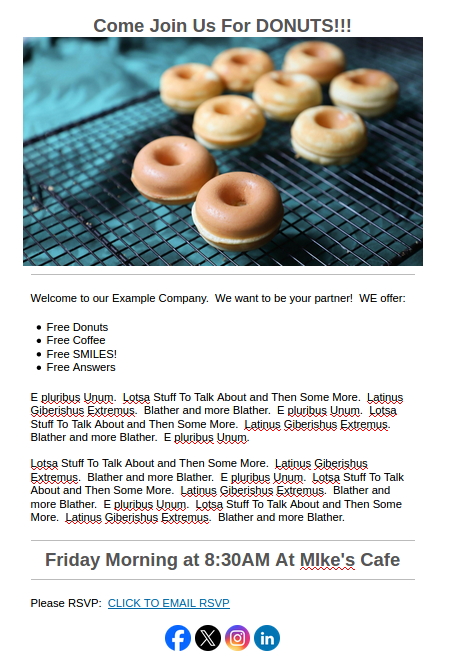
- Finally we clicked [OK] at the bottom right and this is how it looked in the email message that will be sent out:
The Final Message Ready to Be Sent:
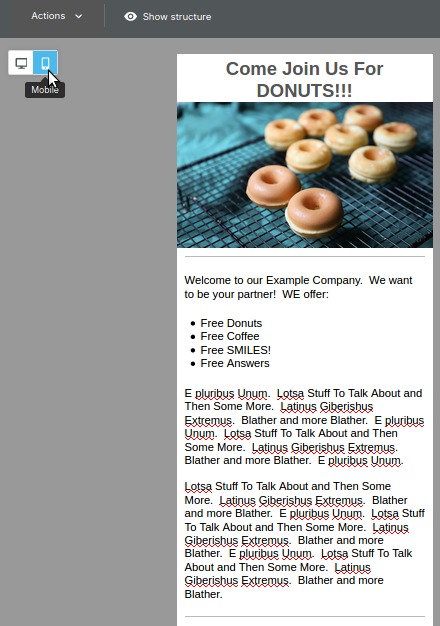
And the possible "phone" view by clicking on the toggle at the top-left:
And now it's time to Send it!
This is an exciting time because you are going to actually send the message out. But there is caution, because:
- We did NOT fill in all the fields so there is missing functionality in this demo (for example, the unsubscribe is non functional) and many other facotrs.
- You MUST ALWAYS Send "TESTS" to verify how it looks and how it operates before sending out a broadcast to dozens, hundreds, thousands and perhaps millions of customers.
- If you are using a FREE Account you may only send an email to the email account you validated when you request a FREE Trial account.
So Slide your pointer up to the top-right and click on [Send Test Email]:

IF YOU ARE NOT READY TO SEND, you can save your work and EXIT the editor by Clicking the little DOWN-ARROW On the RIGHT-HAND Side of the [CHOOSE RECIPIENTS v] button:

Preparing to Send
- Can't send your message without knowing where to send it and if this is the first time on this "MESSAGE" that you have pressed the [SEND TEST EMAIL v] button it will ask you to put in one more more test email addresses so you don't have to re-enter them later during other test sends:
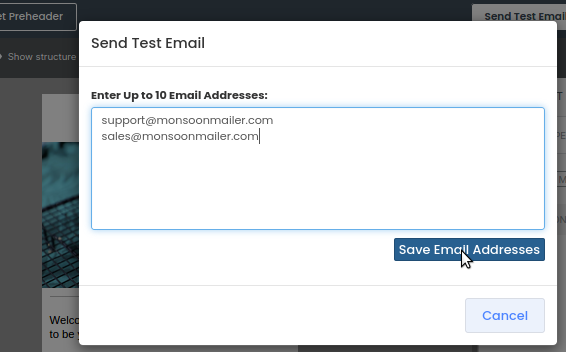
- Keep in mind, if you are in the FREE Account mode if you use any email other than the email you validated when you asked for a free account, the system will tell you:
- If you try to send but you the "Drop All Mail" alert or your account has been paused, you might see this message, contact support@monsoonmailer.com:
- Once you've sent the message you will see a positive affirmation:
Checking Your Inbox...
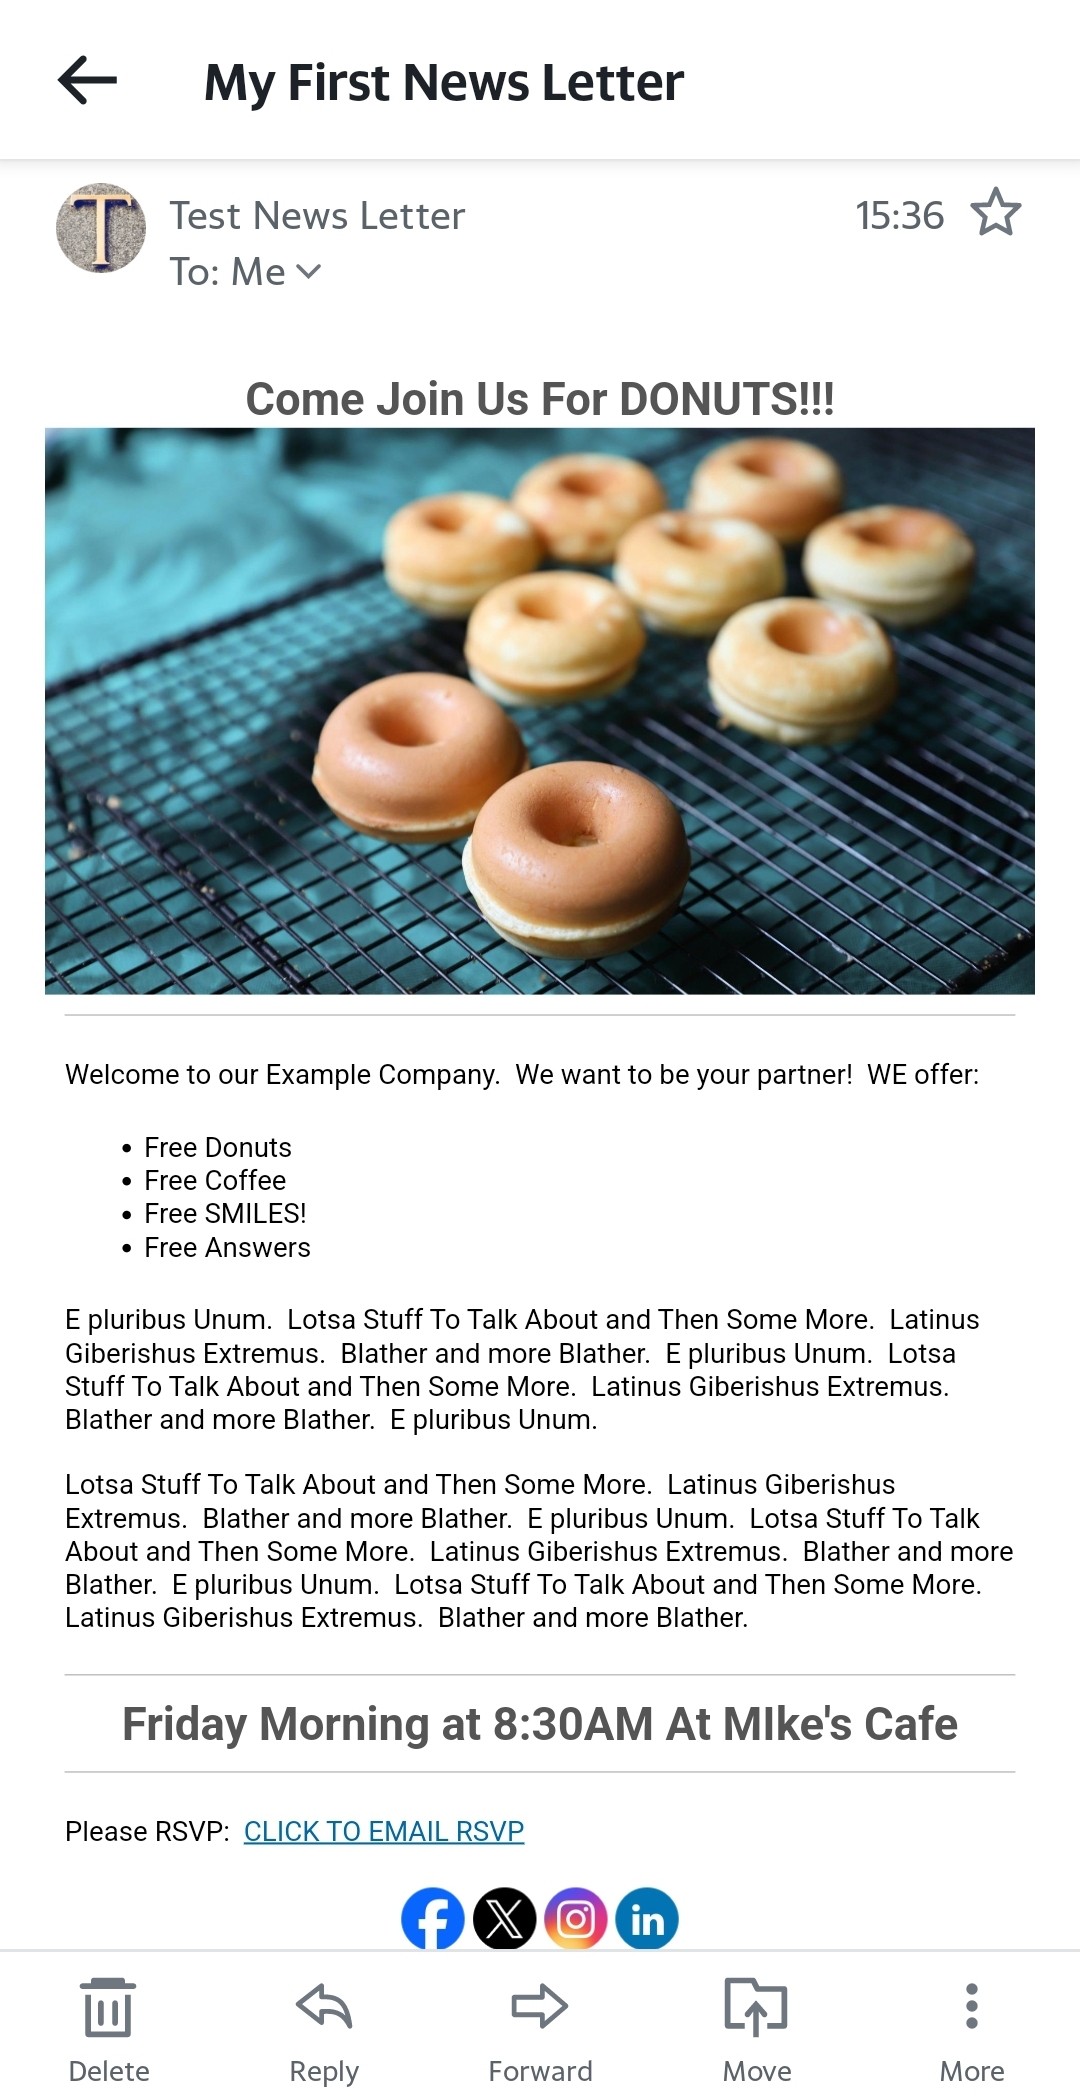
So now keep an eye on your inbox and you will see it like this:

Then click on it on your phone and see it:
Revisiting this Mailing and Others
In the future, if you saved this mailing and you want to either pick up where you have left off or revise it you can go to the Broadcast "DRAFT" Screen and find your mailing, click on the [ACTIONS v] button and select "EDIT" to open the template editor/builder and again access this mailing template or any other:

CONCLUSION:
- It is a fairly simple process to create and send a test mailing.
- You will want to check and revise your template and message as necessary, sending as many tests as necessary to verify operation before you ever send a broadcast.
- Once you are ready to actually send a broadcast, you will want load a list of destinations, segment as needed and then you can tell this mailing to send to a broadcast by clicking on the green [CHOOSE RECIPIENTS] button at the top-right of the template editor/builder, select your recipients and send.
For complete use of this editor here are some video tutorials that will help you: Video Tutorials

